Wood carving tools with sharp edges will enhance your enjoyment. These are the most common ways to sharpen your wood carving tool. Sharp edges are also more durable and last longer than dull ones. Sharp edges are more efficient and allow you to use your tools more effectively. Sharp edges facilitate carving and maximize cutting performance. These are the three most common ways to sharpen wood carving instruments. Read on to learn more. - Using a Sharpening Stone.
Carving pleasure is enhanced by sharp edges
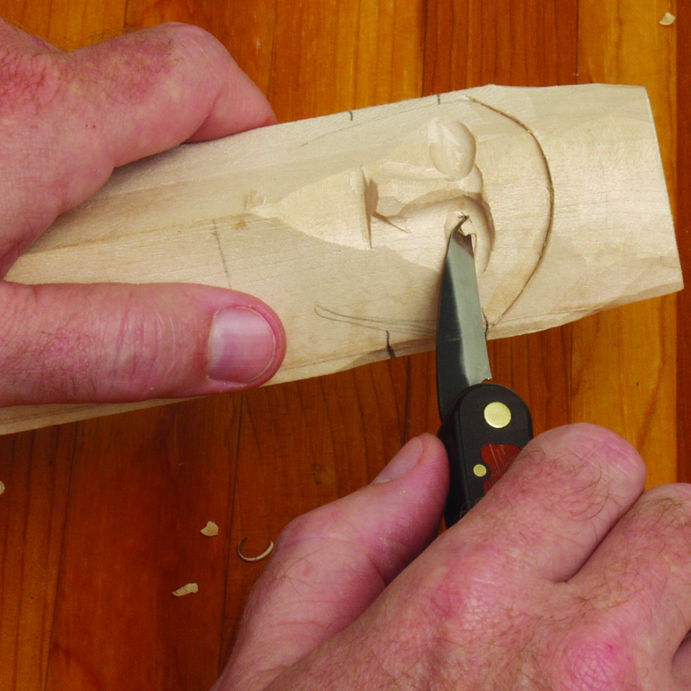
Sharp tools are not only better for carving, but tools with razor-sharp edges make it easier. Sharper tools require less effort, and are easier to control during carving. The smooth surface of a well-cut blade makes for a smooth cut. For a successful carving job, sharp tools are vital. To achieve best results, you should sharpen your carving tools frequently. Regular sharpening will keep the tools sharp and makes carving easier.
Although sharp edges are a pleasure to carve, they can cause blisters. Wood's natural texture, which is rough, will be toughened by regular handling. While blisters can eventually heal into calluses (which is often painful and time-consuming), this process can take a while. If blisters are visible in your carving, you can change how you hold the tools. It may take some practice, but the effort will be well worth it.
To sharpen knives, you should first use a sharpening device and a fine grained stone. Also, check the edge for damage. Chips near the edge require more aggressive grinding. A dull edge might only need minimal grinding with a finer-grit stone. Finally, test the knife by cutting through a piece of rope or paper. You don't need to use a sharpening knife if your knife has been dull for a while.
Common techniques for sharpening wood carving tool
There are many options for sharpening wood carving instruments. There are many ways to sharpen wood carving tools. To prevent metal particles from encrusting on stone surfaces, oil must be applied to oil stones. Diamond and ceramic stones are oil-free and can be used to sharpen carbide wood carving tools. This article will address the most common methods for sharpening wood carving tools.
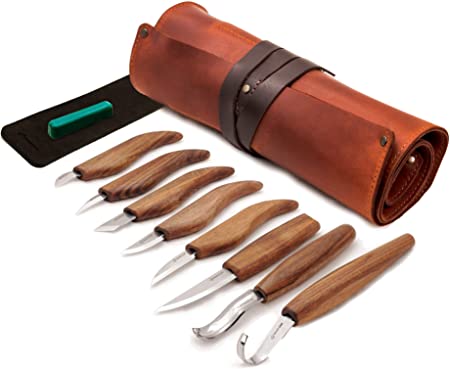
Leather strops can be used to remove the wire edge from a blade and polish it. Although leather strops can be used with all tools, some carvers prefer using a textured one. A flat leather strop works well for straight tools or the outside edge of gouges. For those who take their work seriously, a leather strop that has grooves may be a good investment.
Bench chisels have been sharpened traditionally at a 25-degree angle, with a secondary bevel of 5 degrees. Modern alloys won't work well with these angles and can even cause them to corrode. As a result, you need to raise the angle of the bevel. This requires you to exert more force and will give you less control. Similar to block planes, they are typically sharpened at a 20 degree angle.
Using a sharpening stone
A sharpening knife is a tool that can be used for wood carving. A stone containing grit is a mineral in crystal form. It is stronger than steel and has sharp edge. In order to make the stone's cutting process easier and prevent metal particles being embedded, a lubricant will be required. When your tool has been sharpened to a point that is sharp, it will be easier to use it to cut wood without resistance. The strop, which is typically made of leather, polishes the edge and removes the burr.
There are many kinds of sharpening stones on the market. You can choose from oilstones, waterstones or ceramic stones. Oil stones use oil to prevent fine metal particles from getting buried in the stone's surface. Ceramic and diamond stones do not need any lubricants. Both are effective in sharpening carbide-wood carving tools.
The Sentima sharpening stone is a great example of a quality sharpening system. It has both a coarse stone and a fine stone made from corundum. This material is consistent in grain, which makes it easy to cut and gives it a smooth finish. The unique design makes it easy-to-clean. The sharpening tool is made of durable materials so it can last for many years.
FAQ
Do I need to be a genius to succeed in woodworking?
No. No. Woodworking isn't rocket science. Anyone can learn to use basic powertools and techniques to create beautiful work of art.
You can learn how to woodwork.
The best way to learn anything is by doing. Woodworking takes practice, skill, patience and experience. Mastering any craft takes time.
To actually learn something is the best way. Start small and use what you learn.
Where can you buy your woodworking materials?
You can find everything you need in many places. You can visit your local hardware stores, or you can look online at sites like Amazon.com.
You can also check garage sales and flea markets for old furniture and other materials you can reuse.
Do you have any advice on how to start a woodworking business.
It's not easy to start your own woodworking business. It's worth it if you're passionate and willing to work hard. You'll enjoy the challenge and rewards of owning your own business.
When you are launching a new venture, it is important to be aware of the possibility that you will encounter unexpected difficulties. You might run out unexpectedly of funds. Or you might find that your customers aren’t willing or able to pay as much you had hoped. You must be ready to deal with such situations in order to survive.
Set up a separate account in your bank for your business. You will always know how much money you have coming in.
How can I determine which tools are most suitable for me?
When shopping for tools, it helps to think about your needs and preferences. Are you more comfortable with plastic or metal handles? What size nails and screws do you usually use? Are you more comfortable using power tools than hand tools?
How long does it take you to finish a piece?
It depends on the size of the piece of furniture. A smaller project like picture frames or boxes can be completed in a single day. Larger projects like dining tables and desks require several days. It takes time in order to properly stain or seal the wood.
Is it hard to start my own woodworking business?
Starting your own woodworking business isn't easy. There are many regulations and legal requirements that you will need to comply with. This doesn't necessarily mean that you should go through all the work of setting up a company. Many people opt to join existing businesses instead. This will allow you to avoid paying membership fees and taxes.
Statistics
- The best-paid 10 percent make $76,000, while the lowest-paid 10 percent make $34,000. (zippia.com)
- Average lumber prices rose about 600 percent between April 2020 and May 2021. (familyhandyman.com)
- Woodworkers on the lower end of that spectrum, the bottom 10% to be exact, make roughly $24,000 a year, while the top 10% makes $108,000. (zippia.com)
- The U.S. Bureau of Labor Statistics (BLS) estimates that the number of jobs for woodworkers will decline by 4% between 2019 and 2029. (indeed.com)
External Links
How To
How to make wood joints
This tutorial will teach you how to join two pieces wood together. We will use the "pockethole joint," which means that we drill holes in the wooden pieces and then glue them together. This method is great if your wood's straight and smooth. You may want to consider other methods, such as dowel joining. Here are the steps
-
Drill Pocket Hole Joints. Measure and mark the location where you would like to place the pocket hole joint. Next, drill 3/4 inch holes in each end of each piece using a handheld drilling machine or jigsaw.
-
Sand Smooth. Sanding the wood's edges will ensure that the joint doesn't split.
-
Glue both sides together. Apply glue to the sides of both wood. Allow it to cool for at least 5 minutes before you attach the pieces.
-
Attach the Pieces together. Once the glue has dried, clamp the pieces together so they are flush.
-
Trim Joinery. After the glue dries, trim any excess wood around your joint.
Be sure to leave enough space between each piece so that they can be turned inside-out.