
You can find a variety of patterns for a scroll saw on the internet, including many holiday ones. These patterns can even be used to create Santa mobiles and a basket. Just download one to get started! Then, browse the many other patterns available to find the perfect one for you! Scroll saws are versatile and fun, so why not play with different patterns to create something entirely new?
Simple pattern projects with a scroll saw
An essential skill for any scroll saw owner is the ability to create patterns. There are many different types of patterns that you can choose from. Some are adapted from papercraft or quilting. You can create patterns with high-contrast images, which look like hand-drawn. You can learn how to use your scroll saw by following step-by-step guides and tutorials. You can find many of these patterns in woodworking publications and magazines.
Simple Pattern Projects with Scroll Saws is a great resource. It has 28 projects and detailed instructions on how to select the right wood. It even includes an area for you to create your own designs. You might be tempted not to use existing patterns, but there are many other ways you can get started with your scrollsaw. You can create a wooden heart, bird or silhouette of a dog, for example.
Making a Santa mobile from a scrollsaw
The Christmas tree-shaped mobile scroll saw requires both basic and advanced scroll saw skills. Cut out two stars. The red star should match Santa Claus. You can then make a Santa Mobile by making two holes in each star and one point on the top. You can attach the mobile to the wire by coiling it.
Scroll saw patterns can also be downloaded, from simple two-piece designs up to complex 3D ones. You can find many scroll saw patterns online, some of which are printable. Next, select a pattern that interests you and start! There are many options. You can make a Santa Mobile with a scroll saw. It's a great way for holiday preparation. To sell the pieces, you can cut them out in multiple pieces.
Making a basket from a scroll saw

If you've ever wanted to try your hand at woodworking, making a basket with a scroll saw is an easy way to do it. A simple woodworking skill and the right tools will allow you to create beautiful baskets in no matter how quick you are. It's easy to make a beautiful basket with our full-size scroll saw template. The best part is? You'll be able to assemble your new creation in no time.
This book will show you how to create beautiful, functional baskets, from start to finish. To make baskets you'll need to have a scrollsaw. This book will teach you how to do that. The book is divided into four parts: the base, the rings, and the handle. Each ring will require four 1/16" (2mm), bits, and a #3MGT blade.
Create a nightlight using a scroll saw
Scroll saws can be used to make stunning nightlights if you want to improve your woodworking skills. There are many patterns that you can use to make a nightlight using a scroll saw. These projects are very easy to make and can be used to show off your sawing skills. You can create a nightlight by using a scrollsaw. Here are some simple steps.
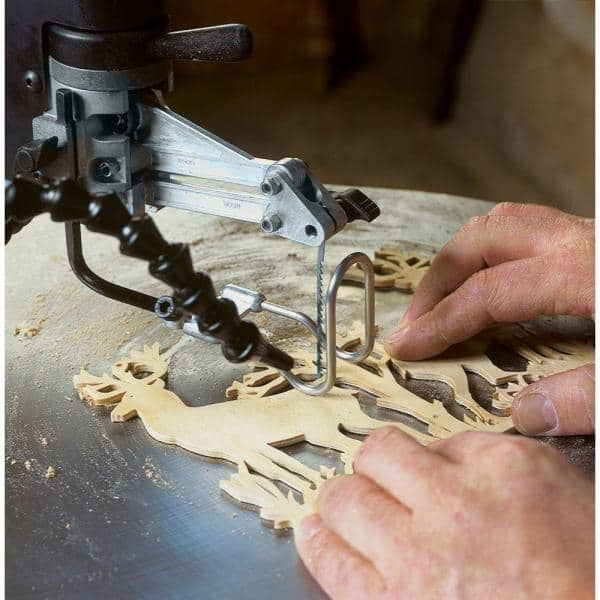
A scroll saw is an excellent tool for making intricate shapes and curves. The vertical blade of the scroll saw can be rotated and positioned to make curved cuts. Scroll saws come in a variety of sizes and are often portable and feature advanced engineering. A scroll saw that reduces vibrations can be found with a patented technology that allows you use it without needing a heavy desk. Many scroll saws have blade and attachment locks that are secure.
FAQ
Do you have the skills to learn woodworking?
It is best to do it yourself. Woodworking is an art that takes patience, practice, skill and experience. It takes time to master any craft.
Learning how to do something is best done by doing it. Start small and use what you learn.
Where can you find free woodworking blueprints?
For free woodworking blueprints, you don’t need to read any magazines or buy any books. You only need to Google search. You can search Google for "free woodworking" and hundreds of websites will appear allowing you to download plans.
Are you a genius in order to master woodworking?
No. Woodworking is not rocket science. It is possible to learn basic tools and techniques that will allow you to create beautiful art.
How long does it take for furniture to be finished?
It depends on the wood type you choose, the complexity and the amount you apply to the finished product. Hardwoods require more care than softwoods. Hardwoods tend to be more expensive that softwoods. However, they are stronger and more resistant to moisture. The average time it takes to finish furniture is one week to three weeks.
Statistics
- If your lumber isn't as dry as you would like when you purchase it (over 22% in Glen Huey's opinion…probably over 10-15% in my opinion), then it's a good idea to let it acclimate to your workshop for a couple of weeks. (woodandshop.com)
- The U.S. Bureau of Labor Statistics (BLS) estimates that the number of jobs for woodworkers will decline by 4% between 2019 and 2029. (indeed.com)
- Overall employment of woodworkers is projected to grow 8 percent from 2020 to 2030, about as fast as the average for all occupations. (bls.gov)
- Most woodworkers agree that lumber moisture needs to be under 10% for building furniture. (woodandshop.com)
External Links
How To
How to make wood joints
This tutorial will help you join two pieces of wooden together. We will use the pocket hole joint, which is drilling holes in the wood to join them. If your wood has a straight grain, smooth surface, you can use this method. Dowel joinery might be a better option if your wood is not straight or flat. Here are the steps
-
Drill Pocket Hole Joints. You will need to measure and mark the exact location of your pocket hole joint. With a handheld drill machine or jig saw, drill 3/4-inch deep holes in the ends of each piece.
-
Sand Smooth. Sanding the wood's edges will ensure that the joint doesn't split.
-
Glue Together. Apply glue to both ends of the wood. Let the wood sit for 5 minutes, then clamp it together.
-
Attach the Pieces together. After the glue has dried properly, clamp the pieces together to make sure they are flush.
-
Trim Joinery. Trim any excess wood surrounding the joint once the glue has dried completely.
To be able to turn the pieces inside-out, leave enough room between them.