You will need to research which woods are best for carving your walking sticks before you begin. You will also want to know about various techniques for whittling and what David Allen uses to carve his walking sticks. Also, be sure to read some famous quotes about walking sticks and how to carve them. Here are some tips for carving the perfect walkingstick. Read on to learn more. This is how you can create a walkingstick that's unique and functional.
Woods that work well for carving a walking stick
Finding a straight piece of blank to carve is the hardest part. While you may find some trees that have branches too long to be useful, you should continue searching until you find the right piece. The ideal time to harvest a straight branch is during the winter months when sap travels from branches to root, making the wood more stable and less likely to split. It's okay to harvest wood while the tree's still green if you cannot wait until spring.
There are many wood species that can be used to make a walking sticks. North American chestnut wood is strong and durable. Its density makes it ideal to make walking sticks, and other similar tools. This wood grain can be slightly or fully open depending on the species. It is a solid walking stick, which feels smooth and solid. It's also very attractive and widely used for carving. Some species can even be carved with the bark in place.
How to make a walking stick
There are a few basic techniques to carve a walking stick. First, choose a piece made of wood that is unique in texture. Some woods are unique in their bark colors and patterns, while others have natural swirls. These characteristics can be improved with paint or lacquer. To make it more attractive, you can carve the wood shaft. Lastly, you should be sure to choose a stick that's straight and free of tough spikes or branch shoots.
In this book, you'll learn about the different types of wood and different carving styles. Most common are snakes and Lions. There are many realistic designs you can create, including snakes and fish. Many people consider the talents of these artists divine. This book is for both the beginner and the expert carver.
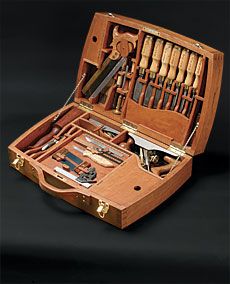
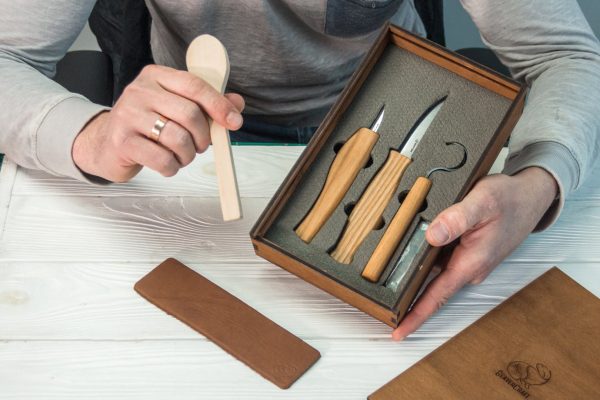
David Allen uses these tools when carving a walkingstick

David Allen began to make toys as a child with a pocketknife that he found under his home. He had to hide it from his family, as he was considered too young to play with a knife. His creations included toys like slingshots and utilitarian objects like shoeshine boxes. Allen was 15, when he became paralysed and began to make walking sticks. Allen worked with a pocketknife, a chisel and a chisel to carve the wood.
Allen created his designs by himself, digging around sapling roots and then deciding what to carve. He believed that the design should be "seeable" before it could ever be carved. This process was similar to that of many African-American artists. Allen had many visions and dreams of the design he wanted. In this way, he was able to create a stick that would evoke the feelings and emotions of his community.
Famous quotes about carving walking sticks
Carving a walking stick requires complex skills and a solid blank. The hardest part of the project is finding a straight blank. While there are many places to source your stick from, it's important that you persevere until you find one that is straight. It might appear bent beyond practical usage, but continue searching until you locate one. It is best to cut your stick during winter sap flow from the tree's branches down to the root. The sap makes the wood softer and less likely split.
Consider the wood's texture and color when choosing wood. Every piece of wood will have its own unique texture, color, and may show bark marks or swirls. A coat of lacquer will enhance these natural swirls. It is important that the wood shaft be free from any branch shoots or hard spikes in order to achieve a smooth finish. This will simplify the whole process. No matter what material you choose to use, it is important that you consider the type and finish you will use.
FAQ
What's the difference between a hobbyist and a professional woodworker?
Hobbyists are passionate about making things from wood, while professionals tend to be more focused on the quality and craftsmanship of their work. Hobbyists are proud of their creations and will often share them with family members and friends. Before they start working on a project, professionals will spend hours researching the designs. Professionals will be meticulous about all aspects of their work, from selecting the right materials to finishing it.
Where can I find my woodworking tools?
There are many places you can get everything you need, and you don't have to go far. You could go to your local hardware shop or visit websites such as Amazon.com.
You can also check garage sales and flea markets for old furniture and other materials you can reuse.
Are you able to teach yourself woodworking
Doing is the best way to learn any subject. Woodworking requires patience, practice and skill. It takes time to master any craft.
You can learn the most effective way to master a skill is by actually doing it. So start small and build on what you have learned from there.
Do you have any other information I should know about woodworking and/or the process of making it?
Furniture making is a laborious task. It's easy not to appreciate how hard it is. Finding the right type of wood is the most difficult aspect of this process. It is difficult to choose between the various types of wood.
The problem with wood is that not all wood properties are the same. Wooden can split or crack, while some woods may warp. Before purchasing wood, you should consider these factors.
Do you have any advice on how to start a woodworking business.
It is hard work to start a woodworking company. It's worth it if you're passionate and willing to work hard. Plus, you'll probably enjoy the challenge of running your own business.
You should remember that unexpected issues may occur when you launch a new venture. You might run out unexpectedly of funds. You might find customers not willing to pay the amount you expected. These situations are necessary for survival.
Set up a separate account in your bank for your business. You'll be able to track how much money comes in and out.
How do you calculate woodworking prices?
When calculating the costs of any project, it is important to keep them as low and affordable as possible. You should always try to make sure that you are getting the best deal on materials. It is also important to consider the costs of other factors, such time, skill, and experience. Our guide to the average household DIY task price will give you an idea of how much it costs to complete different types of woodwork projects.
How can I learn basic woodworking skills
It is an excellent way to learn how to build furniture. You can make a simple bench yourself. This project can be done with any kind of wood that you have at home. If you don't know what kind of wood to use, then go ahead and buy some cheap pine boards from Home Depot or Lowes. You'll need to sand the bench after it's built. Then, finish it with varnish or a stain.
Statistics
- Overall employment of woodworkers is projected to grow 8 percent from 2020 to 2030, about as fast as the average for all occupations. (bls.gov)
- Average lumber prices rose about 600 percent between April 2020 and May 2021. (familyhandyman.com)
- Most woodworkers agree that lumber moisture needs to be under 10% for building furniture. (woodandshop.com)
- The best-paid 10 percent make $76,000, while the lowest-paid 10 percent make $34,000. (zippia.com)
External Links
How To
How to make wooden joints
This tutorial will teach you how to join two pieces wood together. We will use the pocket hole joint, which is drilling holes in the wood to join them. This works well if the wood is straight and smooth. If your wood isn't straight or flat, you might want to try another method, such as dowel joinery. Here are the steps
-
Drill Pocket Hole Joints. To start, measure and mark where you want to put the pocket hole joint. Use a jigsaw or handheld drilling machine to drill 3/8 inch deep holes at the ends of each wood piece.
-
Sand Smooth. The wood's edges can be sanded to prevent splitting.
-
Glue the two sides of the wood together. Apply glue to both the ends of the wood. Allow it to sit for approximately 5 minutes before you clamp the pieces together.
-
Connect the pieces. After the glue has dried properly, clamp the pieces together to make sure they are flush.
-
Trim Joinery. Trim the excess wood around the joint after the glue has dried completely.
You should leave enough space between the pieces to allow you to turn them inside-out.