There are many types and styles of turning tools. Some tools can be made from Carbide and others from HSS or Skew. To maximize the cutting power of a turning tool, it should be properly sharpened. It can be frustrating for new turners to sharpen their tools. Some vendors sell tools with carbide inserts that can be replaced to make it easier. Experienced turners recommend traditional tools. Traditional tools have better cutting surfaces, are easier to use, offer more versatility, and can be used in a variety of different ways.
Carbide
When working on a wood project, it can be very helpful to have a few different types of Carbide turners tools on hand. You have the option of a Savannah Large Carbide Turning Tool, or a smaller one. The Savannah Large Carbide Turning Tool is great for wood turners of all skill levels. The Savannah has a rotatable cutting head that eliminates the need for constant sharpening. This tool also features solid carbide that will stay sharper for a much longer period than the traditional steel tools.
You should remember that while these materials may have many similarities, their respective uses are very different. The carbide inserts in turners tools are generally slightly rounded or square, and are often referred to as "square-edged" tools. The square-edged carbide injects will work best in fastening and removing bulky materials. While the slightly rounded carbide embeds will give the final product a smooth look, they will not be as effective.
HSS
HSS turners tools can be sharpened by using diamond hones. Diamond hones are a great way to sharpen HSS turners tools quickly. There are many options when it comes to sharpening HSS scrapers or carbide. Some turners prefer to use tiny burrs from grinding wheels, rather than hones. These preferences will depend on the type of turning you do and the style of the tool you use.

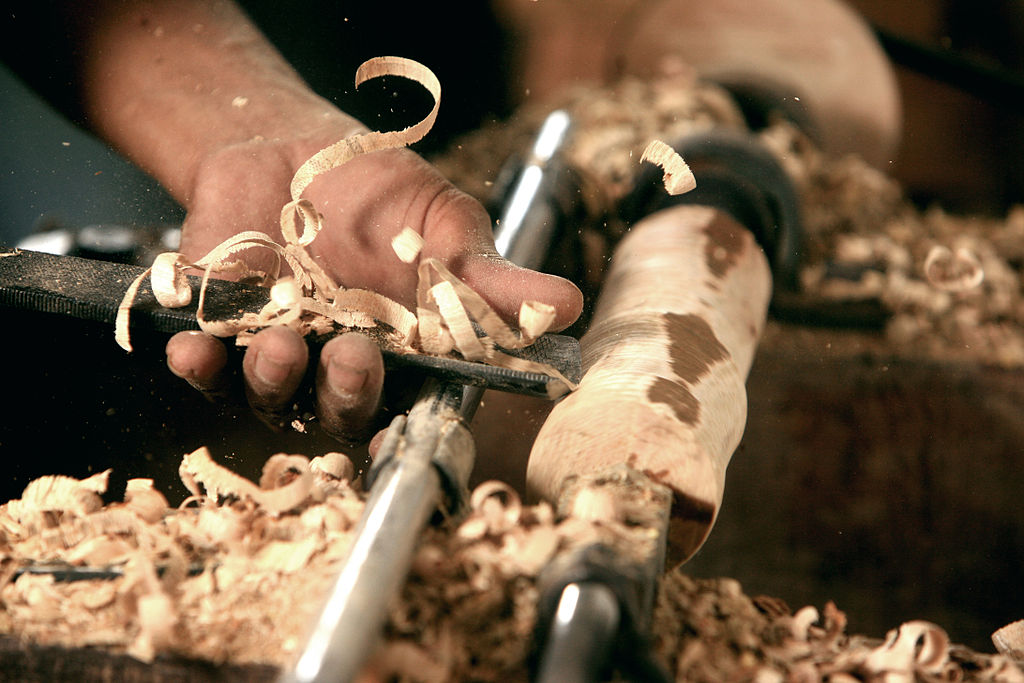
Carbide tools have a lower learning curve than HSS turners tools. Traditional woodworkers won't be impressed by a novice woodworker using a carbide tool. HSS tools produce longer, curly shavings. Carbide tools produce smaller shavings. Both of these materials are also reused to fill holes in natural wood stock. These tools also have a faster cutting speed. But if you are just starting out, a carbide tool may be the right choice.
Skew
Most skew turners use a factory grind skew, which is often blunt. The ideal bevel angle for softwoods is between 25 and 70 degrees, while hardwoods are between 60 and 70 degrees. A cheap HSS blank can be used to make a round skew. This will save you money. These tools work best with small items like pens but can also be used for larger items. We'll be discussing some tips and tricks for sharpening skews in this article.
To cut beads, you will first need a skew. The heel of the hand should be in direct contact with this tool. During the cutting process it is vital that the heel stays in contact to the rest of the tools. It's essential to have timely instruction and practice when you first start woodturning. You can create a great skew with practice. Below are some useful skew-turner tools.
Adjustable sharpening jig
The purchase of a set does not mean you will have to spend time or money sharpening the tools. There are many tools on the market that can already be sharpened. Some sellers also offer tools with interchangeable carbide inserts. These tools are not recommended by many experienced turners. Traditional tools are considered more reliable, have better finishes on wood and are cheaper over the long term.
Bench grinders are the best method to sharpen turning tools. This may work for older tools, but it will not replicate a sharpened one. A bench grinder requires practice, a steady hand, and can often take much more time and effort to reshape a piece. It is difficult to reproduce the shape or sharpness of an existing tool using a bench grinder. This can lead to a dull tool. An adjustable sharpening tool jig can be used to keep your tool in the right place and reproduce its shape. This will ensure that you have a perfectly edged tool every single time.
CBN grinding machines
CBN wheels for turning tools offer several benefits, including increased strength and durability. These grinding wheels are available in various sizes to match different spindles. They can be ordered in 150mm and 200mm as well as 250mm diameters. The diameters can be ordered individually, and they are typically 40 mm wide, with a 32 mm hole. Some models need shims for the size of the spindle.
CBN wheels have a compact design that is durable and can be sharpened to make turning tools more precise. They also slice through carbide. They are strong and durable due to the bond between the grain and the hub. However, some metals are too soft for CBN wheels and can clog them, reducing their grinding power. These materials can reduce the life expectancy of CBN-grinding wheels. These tools should only be used for ferrous metals. Avoid grinding soft materials with them.
FAQ
Where can I find my woodworking tools?
There are plenty of places where you can find everything you need to start out. You could also visit hardware stores in your area or shop online at Amazon.com.
You might also consider flea markets and garage sale for any old furniture or other materials you could reuse.
Which wooden products are most popular?
These wooden products are the most popular. They were made from sustainably harvested wood.
The most popular types of wood for furniture include oak, maple, cherry, mahogany, walnut, and teak.
These woods have beautiful grain patterns and colors. They are also very strong. They are also very durable if properly maintained.
To prevent moisture damage, wood furniture should always first be painted. This applies to all surfaces including drawers, doors, handles, and handles.
You want your furniture to last as long as possible so you need to choose a paint that is water resistant.
Use a high-quality, oil-based primer and two coats of topcoat. Depending on how much wear you expect, you might need to apply more coats of topcoat.
Avoid spray cans and aerosol paints. These products have solvents that evaporate quickly, leaving behind dangerous fumes.
How do I get started as a woodworker?
Woodworking is an art form that requires patience and practice. Learning how to use the various tools and techniques necessary for woodworking takes patience.
There are many types of woodworking equipment on the market today. Some people prefer to use power tools while others prefer manual tools.
The choice is yours, but you must ensure you choose the right tool for the job. A basic set of hand tools may be enough for you if your skills are not yet developed.
You might also consider learning how to use the router to create intricate shapes from wood. You can find these at most hardware stores.
You can learn how to woodwork.
You can learn everything best by doing. Woodworking requires patience, practice and skill. Every craft takes practice and patience.
It is the best way to learn to do something is to actually do it. Start small, and work your way up from there.
Can I refinish furniture that I make?
Yes! There are many options for refinishing furniture that you don't need to hire a professional. Here are a few ideas:
Use sandpaper for removing stains and scratches. Next, wipe the surface clean with a damp cloth.
Apply clear polyurethane finish. Allow furniture to dry completely before you move it around.
Paint furniture with acrylic paint.
Instead of using paint, stain is a better choice. The furniture will have a rich look thanks to the stain.
Use shellac wax. Applying wax will give the wood shine and protection.
Statistics
- Woodworkers on the lower end of that spectrum, the bottom 10% to be exact, make roughly $24,000 a year, while the top 10% makes $108,000. (zippia.com)
- Average lumber prices rose about 600 percent between April 2020 and May 2021. (familyhandyman.com)
- If your lumber isn't as dry as you would like when you purchase it (over 22% in Glen Huey's opinion…probably over 10-15% in my opinion), then it's a good idea to let it acclimate to your workshop for a couple of weeks. (woodandshop.com)
- Overall employment of woodworkers is projected to grow 8 percent from 2020 to 2030, about as fast as the average for all occupations. (bls.gov)
External Links
How To
How to stain wood
Stain wood is a process that involves applying chemicals to the surface of wood, which changes its color. This chemical reaction causes the wood color to change from white and brownish red. Although oak is the most popular type of wood to stain, there are many other types that can be used.
There are several ways to apply stains to wood surfaces. One method involves mixing the stain and a solvent and then spraying it on the wood. Other methods use a solution of water and dye applied directly to the wood. It is possible to mix stain into varnishes and paints, making it part of the finishing coat.
Preparing the wood surface is the first step to staining it. To apply the stain, clean the wood completely. Sanding can smoothen out scratches and uneven spots. The next step is to determine the type of stain you would like to use. There are two main kinds of stains available: non-penetrating stains and penetrating. Penetrating stain penetrates deeper into wood than nonpenetrating, making them suitable for dark colors like mahogany. Light colors such as maple work well with non-penetrating stain.
You will need to decide on the type of stain you want to use, and then prepare your tools. Because you can spread the stain evenly with a paintbrush, it is ideal for applying them. It is a good idea to have rags on hand in case you need them to clean up any stains that may remain after you have finished painting. If you are planning to mix your stain, ensure you have enough containers for each component.
After you have prepared your materials for staining, clean the area. Use soap and warm water to remove dust and grime. Wipe the entire piece of furniture with a rag dampened with clean water. You should remove any debris, especially if your plan is to stain darker wood.
Apply the stain. Next, apply the stain to the furniture by starting at one end. Move slowly and carefully along the grain of your wood until you reach its opposite end. Be careful not to let the stain drip off the wood's edge. Before moving on to the next steps, allow the stain drying completely.
Apply a clear polyurethane sealant to protect the painted surface. Apply three coats with polyurethane. Allow the third coat to dry overnight, before sanding.